背景
这几天对米家智能家居的蓝牙协议感兴趣,想分析一下米家的蓝牙数据。所以开始逆向了米家,但是米家使用 React Native 开发的。所以传统的逆向思路不起作用了。于是开始探索新的逆向方案。
尝试初步分析
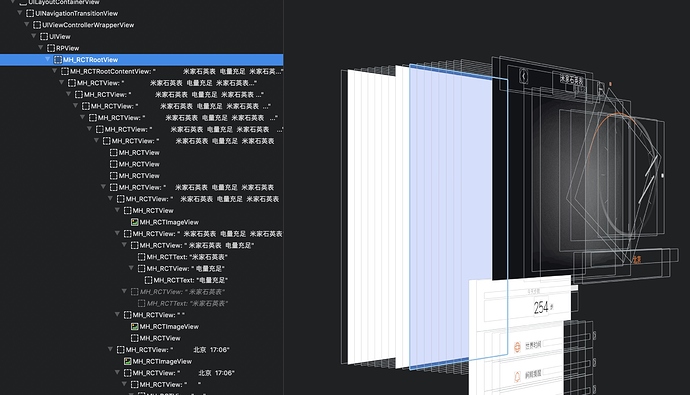
按照老套路,开启 Reveal 看界面!
大量的 RCTView 出现在眼帘,每一个控件都是同一个类名。完全不知道该怎么找入口。
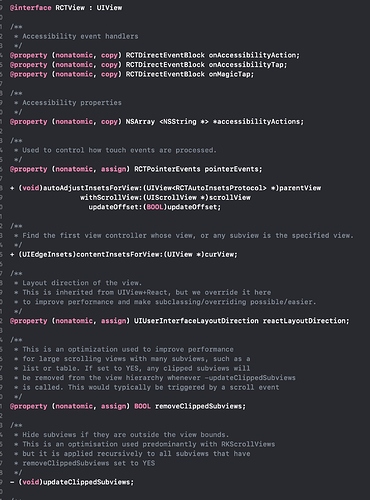
RCTView 是否包含有每一个 component 的 js 信息呢?查看 RN 的源码:
似乎找不到什么信息。看来只能看 JS 代码了。
获取 RN 源码
搞过 RN 开发的人应该知道 RN 通过下发 JS 脚本文件来实现跨平台和热更新。该 JS 文件会运行在 iOS 平台提供的 JavaScriptCore 框架中。所以该 JS 文件必然是一个不会被加密的 脚本文件。因此我们可以想办法直接拿到 JS 文件来分析脚本代码。
RN 入门文档
阅读 RN 文档,就可以知道 RN 通过什么方式来加载这个文件的。
在 React Native 中文网 中表明用 JS 渲染一个原生 UIView 的办法:
- (IBAction)highScoreButtonPressed:(id)sender {
    NSLog(@"High Score Button Pressed");
    NSURL *jsCodeLocation = [NSURL URLWithString:@"http://localhost:8081/index.bundle?platform=ios"];

    RCTRootView *rootView =
      [[RCTRootView alloc] initWithBundleURL: jsCodeLocation
                                  moduleName: @"RNHighScores"
                           initialProperties:
                             @{
                               @"scores" : @[
                                 @{
                                   @"name" : @"Alex",
                                   @"value": @"42"
                                  },
                                 @{
                                   @"name" : @"Joel",
                                   @"value": @"10"
                                 }
                               ]
                             }
                               launchOptions: nil];
    UIViewController *vc = [[UIViewController alloc] init];
    vc.view = rootView;
    [self presentViewController:vc animated:YES completion:nil];
}
所以可以断定,米家应该也有一个 RCTRootView,同时调用了 -[RCTRootView initWithBundleURL:moduleName:initialProperties:launchOptions:] 方法。并且第一个参数 NSURL 就是指向 JS 文件路径的对象。
现在我们尝试获取这个 NSURL 对象。
获取文件路径
RCTRootView 是 Native 代码,我们依旧可以通过老套的方式来分析它。
打开 Reveal,进入米家设备界面(米家石英表为例),检查视图树结构
发现类似控件,名称叫做 MH_RCTRootView,再在 lldb 中输出这个类对应的方法:
lldb: po [MH_RCTRootView _shortMethodDescription]
得到结果
@interface MH_RCTRootView : UIView

- (instancetype)initWithBundleURL:(id)bundleURL
    moduleName:(NSString *)moduleName
    initialProperties:(id)properties
    launchOptions:(id)options;

- (id)initWithBridge:(id)bridge
    moduleName:(id)moduleName
    initialProperties:(id)properties;

@end
于是可以通过断点来获取这个 NSURL 对象。
lldb: breakpoint set -n '-[MH_RCTRootView initWithBundleURL:moduleName:initialProperties:launchOptions:]'
lldb: breakpoint set -n '-[MH_RCTRootView initWithBridge:moduleName:initialProperties:]'
最后 -initWithBridge:moduleName:initialProperties: 方法的断点被激活,输出第一个参数得到 NSURL 地址。
lldb: po [$x2 _ivarDescription]
<MH_RCTBridge: 0x1740b8540>:
in MH_RCTBridge:
	_delegateBundleURL (NSURL*): nil
	_bundleURL (NSURL*): file:///var/mobile/Containers/Data/Application/F137A240-9C3E-4FF2-BD54-B35BAFCF4DF3/Library/Caches/Plugin/cn/com.inshow.watch.ios_20868/main.jsbundle, n
	_executorClass (Class): (null)
	_delegate (<RCTBridgeDelegate>*): nil
	_launchOptions (NSDictionary*): nil
	_flowID (long): 0
	_flowIDMap (struct __CFDictionary*): 0x1740b8578 -> 0x0
	_flowIDMapLock (NSLock*): nil
	_batchedBridge (MH_RCTBridge*): <MH_RCTBatchedBridge: 0x174564380>
	_moduleProvider (^block): <__NSMallocBlock__: 0x174a458b0>
in NSObject:
	isa (Class): MH_RCTBridge (isa, 0x45a1062700ed)
拿到路径。
同时输出第二个参数。得到 RN 根视图的 component:
lldb: po $x3
com.inshow.watch.ios
接下来就去拿文件吧。
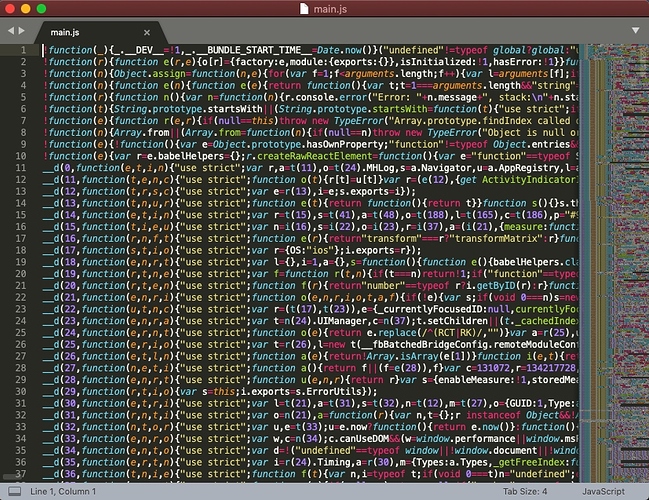
emmmm。。。。。。
整理代码缩进
这五颜六色看的让人恶心。。。。
可以用在线工具整理一下。
符号表恢复
接下来可以通过前面找到的根 component name 来寻找根界面。在脚本中搜索 com.inshow.watch.ios 文本。
![]()
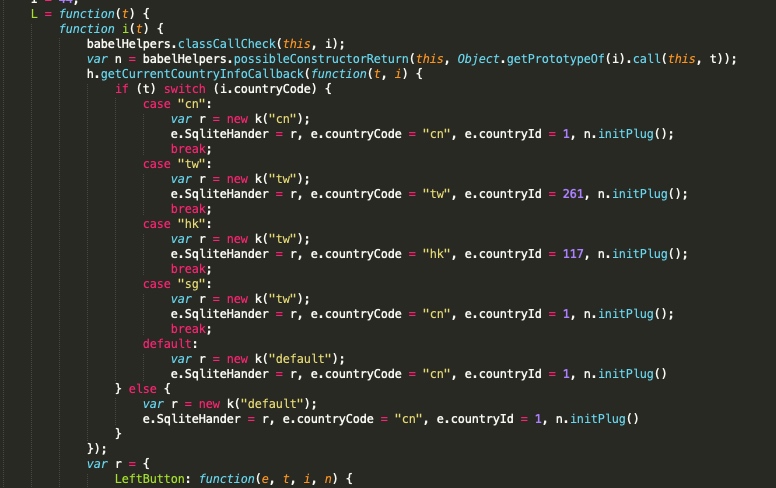
于是可以看出变量 L 就是根界面的 component。向上寻找 L 的定义:
在初始化的时候米家获取了当前系统的语言,根据不同语言来渲染不同界面。
但是这还是很难看出 React 语法。继续往下看。。。
return babelHelpers.inherits(i, t), babelHelpers.createClass(i, [{
                key: "initPlug",
                value: function() {
                    //...
                }
            }, {
                key: "showLoadPage",
                value: function() {
                    var t = this;
                    return new Promise(function(i, n) {
                    //...
                    })
                }
            }, {
                key: "componentWillMount",
                value: function() {
                    //...
                }
            }, {
                key: "componentDidMount",
                value: function() {
                    //...
                }
            }, {
                key: "componentWillUnmount",
                value: function() {
                    //...
                }
            }, {
                key: "render",
                value: function() {
                    //...
                }
            }, {
                key: "setIsNavigationBarHidden",
                value: function(e) {
                    this.setState({
                        isNavigationBarHidden: e
                    })
                }
            }, {
                key: "setNavigationBarStyle",
                value: function(e) {
                    this.setState({
                        navBarStyle: e
                    })
                }
            }, {
                key: "pathForResource",
                value: function(e) {
                    return h.basePath + e
                }
            }, {
                key: "sourceOfImage",
                value: function(e) {
                    return {
                        uri: this.pathForResource(e),
                        scale: g.get()
                    }
                }
            }]), i
        }(a.Component),
终于看到了 render 函数。虽然结构体和 React 语法中的优点差异,但稍微看一下还是能看出一点花样。
很明显,这样的 JS 代码应该是被压缩过的。如果有大佬知道如何去恢复这种压缩过的 JS 文件可以指教一下。这里可以理解为去除符号表。但是代码依旧是明文,尚未加密。所以慢慢看还是能静态分析出一些东西。
为了更好的分析软件行为,我们可以在 js 特定文件中加入自己想知道的数据,通过 Log 实现。
添加控制台输出
log 无疑是 debug 程序最好的工具。
在 JS 代码中,笔者发现开发人员本身写的 console.log 函数。笔者尝试自己写入 console.log 信息,但是发现并没有在控制台中输出。
可以猜测 RN 代码再 Release 下屏蔽了 console.log 。
Release 下恢复 console.log
阅读 RN 源码,查看原本 console.log 实现,看看是否能在 Release 下恢复 console.log 功能。
经过笔者一番折腾决定放弃这一个想法。
尝试添加 NativeBridge 实现 log
此时想到可以通过添加 bridge 的方式来添加 log 功能。还是继续阅读 RN 源码。找到添加 bridge 的宏定义,自己创建一个 log
@protocol RCTBridgeModule <NSObject>

/**
 * Place this macro in your class implementation to automatically register
 * your module with the bridge when it loads. The optional js_name argument
 * will be used as the JS module name. If omitted, the JS module name will
 * match the Objective-C class name.
 */
#define RCT_EXPORT_MODULE(js_name) \
RCT_EXTERN void RCTRegisterModule(Class); \
+ (NSString *)moduleName { return @#js_name; } \
+ (void)load { RCTRegisterModule(self); }

/**
 * To improve startup performance users may want to generate their module lists
 * at build time and hook the delegate to merge with the runtime list. This
 * macro takes the place of the above for those cases by omitting the +load
 * generation.
 *
 */
#define RCT_EXPORT_PRE_REGISTERED_MODULE(js_name) \
+ (NSString *)moduleName { return @#js_name; }

// Implemented by RCT_EXPORT_MODULE
+ (NSString *)moduleName;

@end
展开 RCT_EXPORT_MODULE 宏定义,发现大致如下:
+ (void)load {
    RCTRegisterModule(self);
}
用到了函数 RCTRegisterModule,进入 IDA 寻找米家对应的实现,发现 bridge 都用了 MHPhilipsLightNativeBridgeModule 的 + load 方法来注册。
于是尝试自己注册 bridge:
+ (void)load {
    static dispatch_once_t onceToken;
    dispatch_once(&onceToken, ^{
        Method method = class_getClassMethod(objc_getClass("MHPhilipsLightNativeBridgeModule"), @selector(load));
        NSLog(@"MiHomeFaker: find method %p", method);
        RCTRegisterModule_t RCTRegisterModule = (RCTRegisterModule_t)method_getImplementation(method);
        NSLog(@"MiHomeFaker: find IMP %p", RCTRegisterModule);
        RCTRegisterModule(self, _cmd);
    });
}
然而并没有啥卵用。。。。只能寻求新的方案
仿 JSPatch 思路添加 log
到这里,笔者想到 JSPatch 中将 log 导出到 Xcode 的控制台。于是翻了 JSPatch 的代码,将 JSContext 里加入自定义函数。
//#import <MUHook/MUHook.h>
MUHInstanceImplementation(JSContext, init, JSContext *) {
    self = MUHOrig(JSContext, init);
    self[@"NSLog"] = ^(NSString *format) {
        NSLog(@"%@", format);
    };
    return self;
}
//MUHHookInstanceMessage(JSContext, init, init);
然后在 JS 脚本中加入自己的 log 代码
NSLog("test log");
控制台成功输出!完美。
接下来就是在各个方法中加入自己的 log 来分析脚本行为。
TODO
虽然拿到了 JS 代码,但是还是有很多不尽人意的地方。
没有特定的符号表恢复工具
JS 压缩增加了静态分析的门槛。由于笔者没有逆向 JS 的经验,并不知道是否存在有类似解压工具来恢复代码。
无法恢复 console.log
即使使用了自己的 log 函数,但是还是有缺陷:
- 本身的 console.log 不会输出
- 不支持多参数
- 不支持 format
解决 1 就能解决 2 3。这一部分还是要继续看 RN 的源码来解决。
无法开启远程 debug
RN 在 Debug 模式下可以通过 Socket 开启一个服务端口,然后在 Mac 上打开浏览器进行远程 debug js 代码,支持断点和单步调试。
这些功能在 Release 模式下全部删除。笔者分析了 RN 的源代码,从摇晃设备弹出 RN debug 菜单开始。但代码过多还需要花时间继续研究。


